
Category

Stain Type

Bensley & Bensley’s Impregnation for Reticulin

By Metal Impregnation, Metal Impregnation, Silver, Protocols, Reticulin, Stain Target, Stain Type

Bensley & Bensley's Impregnation

for Reticulin

18
steps
14
materials

Materials

Solutions

MaterialVar IVar II
Lugol’s iodine++
Potassium permanganate, 1% aqu.++
Oxalic acid, 5% aqu.++
Sodium thiosulphate, 3% aqu.++
Tannic acid, saturated in ethanol, 95%.+
Strong ammonium hydroxide (s.g. 0.88)++
Ammoniated water+
Silver nitrate, aqu.1%2%
Formalin, 20% aqu.++
Yellow gold chloride, 0.2% aqu.++
Sodium hydroxide, 40% aqu.++
Neutral red, 1% aqu.++

Lugol’s iodine

MaterialAmount
Iodine1g
Potassium iodide2g
Distilled water300mL

Mix the iodine and potassium iodide in a 500 mL flask. Add 5 mL of the water. When the iodine has dissolved make up to 300 mL with distilled water.

Ammoniacal silver – Var I

Place 20 mL of 1% silver nitrate in a flask. Add 4 drops of 40% sodium hydroxide Add ammonium hydroxide by drops until the precipitate is almost dissolved. Dilute 1:10 with distilled water.

Ammoniacal silver – Var I

Place 20 mL of 2% silver nitrate in a flask. Add 3 drops of 40% sodium hydroxide Add ammonium hydroxide by drops until the precipitate is just dissolved.

Tissue Sample

Bensley & Bensley said that sections of tissue fixed in Zenker, Helly, ethanol or formalin are suitable. Although they commented that Var I gave a complete impregnation of paraffin or celloidin embedded tissue, they recommended Var II for paraffin sections because of their tendency to detach from slides. A section adhesive is recommended.

Protocol

  1. Bring sections to water via xylene and ethanol.
  2. Oxidise in 1% potassium permanganate for 5 min.
  3. Bleach with 5% oxalic acid.
  4. Place in Lugol’s iodine.
  5. Bleach in 3% sodium thiosulphate.
  6. Wash with water.
  7. For Var I:
    1. Place in tannic acid solution at 56°C for 5 min.
    2. Rinse with ammoniated distilled water.

    For Var II:

    1. Place in 2% silver nitrate for 16 hrs.
  8. For Var I: Ammoniacal silver solution, VAR I, at 56°C for 10 min. For Var II: Ammoniacal silver solution, VAR II, at room temperature for 30 min.
  9. Wash with water.
  10. Reduce with 20% formalin for 3 min.
  11. Wash with water.
  12. Tone with 0.2% yellow gold chloride.
  13. Wash with water.
  14. Place in 3% sodium thiosulphate.
  15. Wash with water.
  16. Place in neutral red for 1 min.
  17. Wash with water.
  18. Dehydrate with ethanol, clear with xylene and mount in a resinous medium

Expected Results

  • Reticulin fibres – black
  • Nuclei – as counterstained
  • Background – grey or as counterstained

Notes

  • In the method details above, several steps do not have times given, meaning that the step is required but no other details were given. Common sense should prevail, and the step done for sufficient time to accomplish its obviously intended purpose. If it is a water wash for removal of an excess of the preceding material it would usually be for approximately 1-2 minutes. If it is for toning with gold chloride then see the final note below.
  • The method details also often specify to “Wash in water” without saying whether distilled or tap water should be used. In many cases it does not matter, but common sense should prevail. If tap water is likely to produce a non-specific precipitate of silver, then use distilled water and, when it specifies to “wash”, give several changes. Tap water varies in quality and individual laboratory’s results may differ due to that. Of course, distilled water could be used throughout, but it is strongly recommended after the silver or gold chloride solutions since these may be affected by tap water contaminants.
  • Bensley & Bensley said that “the silver carbonate solution of Hortega” could be substituted for their own silver oxide solution in Var I. Hortega gave form several such solutions and the authors do not say which one they meant. These formulas differ mainly by the amounts of 10% aqueous silver nitrate added to 5% aqueous sodium carbonate. All redissolve the resulting precipitate with drops of strong ammonium hydroxide.Hortega’s Ammoniacal silver solutions
    • Place 50 mL of 5% sodium carbonate in a flask. Add 12 mL of 10% silver nitrate. Let the precipitate settle, then decant the supernatent. Wash, allow to settle and decant several times. Add ammonium hydroxide by drops until the precipitate is almost dissolved. Dilute to 100 mL with distilled water.
    • In addition to the formula above, another adds 12.5 mL silver nitrate, does not decant and wash, but does dilute to 100 mL with distilled water.
    • A third adds 20 mL silver nitrate to 80 mL sodium carbonate, does not decant and wash, and does not dilute with distilled water.
    • A fourth adds 25 mL silver nitrate to 75 mL sodium carbonate, does not decant and wash, and does not dilute with distilled water.
    • A fifth adds 12 mL silver nitrate to 50 mL saturated aqueous lithium carbonate, decants and washes, and dilutes to 100 mL with distilled water.
  • Ensure that the ammonium hydroxide is fresh and full strength. Keep well stoppered when not in use. After removing the amount required immediately restopper the bottle.
  • Improperly made ammoniacal silver solutions can affect the quality of the impregnation. There should be a faint, persistent opalescence, with only a faint smell of ammonia.
  • 20% formalin is made by diluting 20 mL strong formalin with 80 mL water.
  • Bensley & Bensley suggested either Heidenhain’s Azan or 1% aqueous acridine red as counterstains. I have substituted neutral red.
  • The formula given for Lugol’s iodine is now usually referred to as Gram’s iodine.
  • Toning is a variable step. Untoned sections give dark brown reticulin fibres on a paler brown background. Many microscopists prefer to tone for about 15 seconds to produce brown-black reticulin fibres on a pale grey-brown background. Others tone longer (a few minutes) to produce black reticulin fibres on a grey background. Longer toning produces purple tones. Tone according to the personal preference of the microscopist reviewing the slides.

Safety Note

Prior to handling any chemical, consult the Safety Data Sheet (SDS) for proper handling and safety precautions.

References

  1. Bensley R. R. and Bensley, S. H., (1938)
    Handbook of Histological and Cytological Technique.
    U. Chicago Press, Chicago, USA
  2. Gray, Peter. (1954)
    The Microtomist’s Formulary and Guide.
    Originally published by: The Blakiston Co.
    Republished by: Robert E. Krieger Publishing Co.

Hine’s Hematoxylin & Eosin for Block Staining

By Hematoxylin and Eosin Staining, Protocols, Stain Type

Hine's H&E for Block Staining

14
steps
12
materials

Hine’s method is designed to stain blocks of tissue with hematoxylin and eosin (H & E). The blocks are then sectioned, dried and immediately coverslipped. Numerous identical stained sections may be prepared for demonstration and educational purposes.

Materials

Hematoxylin

MaterialAmountFunction
Hematoxylin, 1% aqueous100 mLDye
Aluminum sulphate, 5% aqueous75 mLMordant
Lugol’s iodine25 mLOxidant
Acetic acid, glacial8 mLSolvent
Glycerol50 mLStabiliser

Eosin

MaterialAmountFunction
Ethyl eosin1 gDye
90% ethanol100 mLSolvent

Worcester’s fluid

MaterialAmountFunction
Distilled water200 mLSolvent
Mercuric chloride14 gFixing agent
Formalin, concentrated22.5 mLFixing agent
Acetic acid, glacial25 mLFixing agent

Compounding Procedures

Hematoxylin

  1. Add the ingredients in the order listed.
  2. Filter before use.

Eosin

  1. Dissolve the eosin in the ethanol, and let stand for one month.
  2. For use, dilute with an equal volume of 90% ethanol and filter.

Worcester’s fluid

  1. Dissolve the mercuric chloride in the water.
  2. Immediately prior to use add the formalin and acetic acid.

Protocol

  1. Place fresh tissue blocks in Worcester’s fluid or formalin fixed tissue blocks in formol sublimate. Blocks should be no thicker than 1.5 cm. Fix overnight.
  2. Remove from fixative and place into 70% ethanol for one hour.
  3. Add Lugols iodine to 70% ethanol until dark brown, and complete removal of mercury pigment. Place the tissue into the ethanol and change three times over about 48 hours. The time varies depending on the tissue.
  4. Transfer to fresh 70% ethanol (no iodine) for two hours, then to distilled water for one hour. Trim the tissue to size for processing.
  5. Place the blocks into hematoxylin for seven days.
  6. Wash blocks in running tap water overnight.
  7. Begin dehydration with 70% and 80% ethanols for appropriate periods.
  8. Stain with the working eosin solution for five days.
  9. Dehydrate with absolute ethanol, two changes over five to eight hours.
  10. Blot off excess ethanol and clear in cedarwood oil.
  11. Blot off excess cedarwood oil and place into xylene, two changes for ten minutes each.
  12. Impregnate with paraffin wax under vacuum, three changes of one hour each.
  13. Block out and section.
  14. Remove wax with xylene and coverslip with a resinous medium.

Expected Results

  • Nuclei – blue
  • Background – shades of pink

Notes

  • The method gives good results with all tissue except CNS.
  • Staining of sections has not deteriorated after 18 years.
  • Staining of processed tissues has not deteriorated after 18 years.
  • Bouin’s fluid can replace Worcester’s fluid, but the yellow colouration should be removed by placing in sodium bicarbonate in 50% ethanol (concentration not specified) instead of the iodinated 70% ethanol.
  • If needed, decalcification can be done with Gooding and Stewart’s fluid after removal of mercury pigment and before staining with hematoxylin.
  • The hematoxylin and eosin solutions can be re-used.

Safety Note

Prior to handling any chemical, consult the Safety Data Sheet (SDS) for proper handling and safety precautions.

References

  1. Hine, Ian F., (1981)
    Block staining of mammalian tissues with hematoxylin and eosin.
    Stain technology, v 56, p 119

Böhmer’s Alum Hematoxylin

By Dye Type, Hematoxylin and Eosin Staining, Mordanted Hematoxylin, Protocols, Stain Type

Böhmer's Alum Hematoxylin

15
steps
4
materials

Böhmer’s formula is the original alum hematoxylin solution for nuclear staining. It is included for educational and historical reasons as the solution has little use in modern histotechnology.

Materials

Solution A

MaterialVariantFunction
Var 1Var 2
Hematoxylin3.5 g8 gDye
100% ethanol100 mL100 mLSolvent

Solution B

MaterialVariantFunction
Var 1Var 2
Ammonium alum0.3 g0.3 gMordant
Distilled water100 mL100 mLSolvent

Compounding procedure

Var 1 is taken from the Microtomist’s Formulary and Guide, and Var 2 from the Microtomist’s Vade-Mecum. The difference in concentration of the hematoxylin may be due to converting an alcoholic logwood extract to grams of dye. In any case, the way it is used makes the differences irrelevant.

Originally, solution A would have been made by soaking logwood chips in ethanol until a suitable concentration of dye was obtained. The solution would then have been allowed to ripen for a long time until it was distinctly deep brown, and filtered before it was used. In a modern variation, simply dissolve the dye in ethanol and leave to ripen, or add a small amount of sodium iodate.

The original called for a few drops of solution A to be added to a small quantity of solution B in a watch glass until the depth of color was judged to be correct. For today’s use, perhaps 5 mL solution A added to 45 mL solution B, more or less, would be satisfactory.

Protocol

Standard Method

  1. Place a small amount of staining solution into a watch glass.
  2. Place frozen sections into the staining solution for an appropriate time.
  3. Transfer sections through at least two changes of clean water.
  4. Mount onto slides.
  5. Dehydrate in ethanol, clear in xylene and mount with a resinous medium

Alternative Method

  1. Bring sections to water via xylene and ethanol.
  2. Place into the staining solution for an appropriate time.
  3. Rinse with water and blue.
  4. Rinse well with water.
  5. Counterstain if desired.
  6. Dehydrate with ethanol, clear with xylene and mount with a resinous medium.

Expected Results

  • Nuclei  –  blue
  • Background  –  as counterstain or unstained

Notes

  • The appropriate time should be determined by trial, but 10-20 minutes should suffice. The time will depend on the amount of solution A added to solution B. Smaller amounts are likely to take longer to stain with a paler final coloration.
  • Blueing is done with alkaline solutions such as hard tap water, Scott’s tap water substitute, 0.1% ammonia water, 1% aqueous sodium acetate, 0.5% aqueous lithium carbonate etc.

Safety Note

Prior to handling any chemical, consult the Safety Data Sheet (SDS) for proper handling and safety precautions.

References

  1. Gray, Peter. (1954)
    The Microtomist’s Formulary and Guide.
    Originally published by: The Blakiston Co.
    Republished by: Robert E. Krieger Publishing Co.
  2. Bolles Lee, A.. Edited by Gatenby, J.B. and Beams, H.W., (1950)
    The Microtomist’s Vade-Mecum. 11 ed.,
    Churchill, London, UK.

Bosma’s Alum Hematoxylin

By Dye Type, Hematoxylin and Eosin Staining, Mordanted Hematoxylin, Protocols, Stain Type

Bosma's Alum Hematoxylin

8
steps
6
materials

Materials

MaterialAmountFunction
Hematoxylin, 10% alc.25 mLDye
Ammonium alum25 gMordant
Tap water865 mLSolvent
Diethylene glycol100 mLStabiliser
Sodium iodate0.2 gOxidant
Glacial acetic acid10 mLAcidifier

Compounding procedure

  1. Place 815 mL hot tap water in a large flask.
  2. Add the ammonium alum, mix well to dissolve and cool to room temperature.
  3. Add the alcoholic hematoxylin solution (ripened).
  4. Add the sodium iodate dissolved in 50 mL cold tap water and mix well.
  5. Add the diethylene glycol and mix well.
  6. Add the acetic acid and mix well. The pH should be 3.1 to 3.3 and the solution may be used immediately.

Protocol

  1. Bring sections to water with xylene and ethanol.
  2. Place into the staining solution for an appropriate time.
  3. Rinse well with water.
  4. Differentiate with acid ethanol if necessary.
  5. Rinse with water and blue.
  6. Rinse well with water.
  7. Counterstain if desired.
  8. Dehydrate with ethanol, clear with xylene and mount with a resinous medium.

Expected Results

  • Nuclei  –  blue
  • Background  –  as counterstain or unstained

Notes

  • The staining time should be determined by trial.
  • Acid ethanol is 0.5% – 1% hydrochloric acid in 70% ethanol.
  • Blueing is done with alkaline solutions such as hard tap water, Scott’s tap water substitute, 0.1% ammonia water, 1% aqueous sodium acetate, 0.5% aqueous lithium carbonate etc.

Safety Note

Prior to handling any chemical, consult the Safety Data Sheet (SDS) for proper handling and safety precautions.

References

  1. Bosma, Rob
    A useful hematoxylin without toxic chemicals.
    Histologic, V 18, Nº 1, January 1988

Brillmeyer’s Trichrome for Muscle and Collagen

By Protocols, Stain Type, Trichrome Staining, Trichrome, Multi-Step

Brillmeyer's Trichrome

for Muscle and Collagen

8
steps
6
materials

Materials

Solution A

MaterialAmount
Acid fuchsin0.2g
Distilled water100mL

Solution B

MaterialAmount
Aniline blue0.5g
Orange G2g
Phosphomolybdic acid1g
Distilled water100mL

Tissue Sample

5µ paraffin sections of neutral buffered formalin fixed tissue are suitable. Other fixatives are likely to be satisfactory. Most trichrome stains benefit from picric acid or mercuric chloride fixation.

Protocol

  1. Bring sections to water via xylene and ethanol.
  2. Stain with an acid resistant nuclear stain.
  3. Place into solution A for 1 minute.
  4. Drain.
  5. Place into solution B for 2-3 hours.
  6. Wash briefly with distilled water.
  7. Dehydrate with ethanol.
  8. Clear with xylene and mount with a resinous medium.

Expected Results

  • Nuclei  –  blue or black
  • Erythrocytes  –  yellow
  • Cytoplasm  –  red
  • Collagen  –  blue

Notes

  • The original technique recommended nuclear staining in Delafield’s alum hematoxylin, with blueing.
  • Weiss modified this method to shorten the time required.

Safety Note

Prior to handling any chemical, consult the Safety Data Sheet (SDS) for proper handling and safety precautions.

References

  1. Gray, Peter. (1954)
    The Microtomist’s Formulary and Guide.
    Originally published by: The Blakiston Co.
    Republished by: Robert E. Krieger Publishing Co.
Burns, Pennock & Stoward’s Thioflavine T for Amyloid Fluorescence

By Amyloid, Fluorescent Staining, Protocols, Stain Target, Stain Type
Protocol

Burns, Pennock & Stoward's Thioflavine T

for Amyloid Fluorescence

6
steps
3
materials

Materials

Tissue Sample

5µ paraffin sections of neutral buffered formalin fixed tissue are suitable.


Protocol

  1. Bring sections to water via xylene and ethanol.
  2. Stain nuclei with alum hematoxylin.
  3. Rinse well with water.
  4. Stain with thioflavine T solution for 5 minutes.
  5. Blot, rinse well with absolute ethanol.
  6. Mount in a fluorescence free resinous mounting medium.

Expected Results

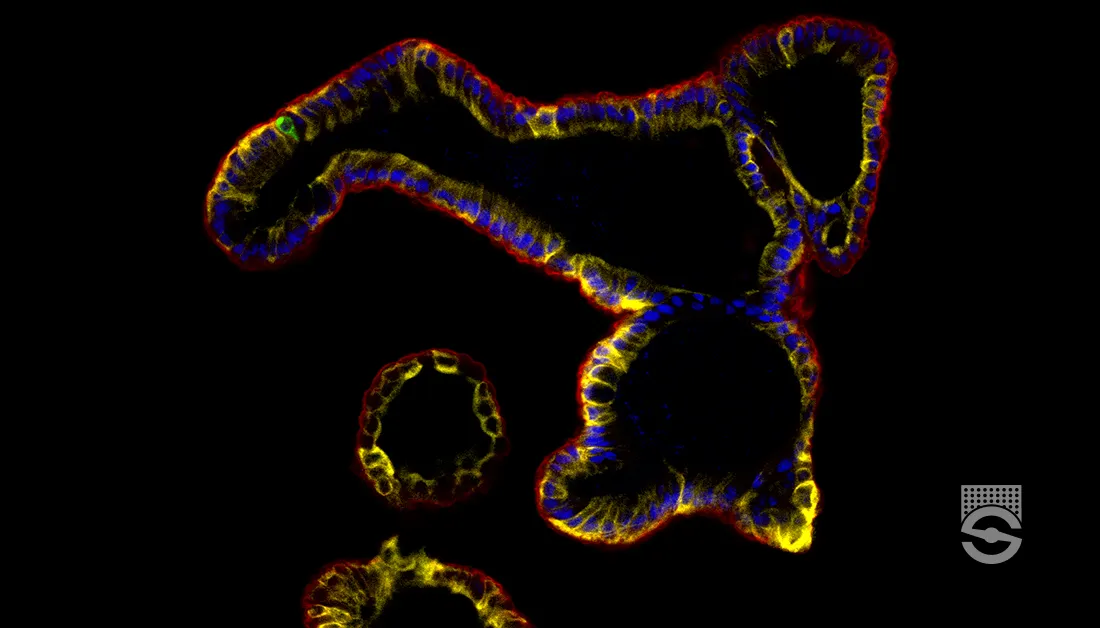
Using a UG1 or UG2 exciter filter and a UV barrier filter, or a BG12 exciter and an OG4 or OG5 barrier filter, amyloid fluoresces lime green or blue.

Safety Note

Prior to handling any chemical, consult the Safety Data Sheet (SDS) for proper handling and safety precautions.


References

  1. Burns, J., Pennock, C.A. and Stoward, P.J., (1967),
    The specificity of the staining of amyloid deposits with thioflavine T,
    Journal of pathology and bacteriology, v 94, page 337.
  2. Bancroft, J.D. and Stevens A. (1982)
    Theory and practice of histological techniques Ed. 2
    Churchill Livingstone, Edinburgh & London, UK.

Bullard’s Alum Hematoxylin

By Dye Type, Hematoxylin and Eosin Staining, Mordanted Hematoxylin, Protocols, Stain Type

Bullard's Alum Hematoxylin

8
steps
10
materials

Materials

MaterialAmountFunction
Hematoxylin8 gDye
Ammonium alum20 gMordant
Distilled water250 mLSolvent
50% ethanol144 mLSolvent
Glacial acetic acid16 mLAcidifier
Mercuric oxide, red8 gOxidant
95% ethanol275 mLSolvent
Glycerol330 mLStabiliser
Glacial acetic acid18 mLAcidifier
Ammonium alum40 gMordant

Compounding procedure

  1. Combine the first five ingredients and bring to a boil.
  2. Add the mercuric oxide with caution.
  3. Cool and filter.
  4. Add the last four ingredients.
  5. The solution may be used immediately, and is stable for more than a year.

Protocol

  1. Bring sections to water with xylene and ethanol.
  2. Place into the staining solution for an appropriate time.
  3. Rinse well with water.
  4. Differentiate with acid ethanol if necessary.
  5. Rinse with water and blue.
  6. Rinse well with water.
  7. Counterstain if desired.
  8. Dehydrate with ethanol, clear with xylene and mount with a resinous medium.

Expected Results

  • Nuclei  –  blue
  • Background  –  as counterstain or unstained

Notes

  • The solution is likely regressive
  • The appropriate time should be determined by trial.

Safety Note

Prior to handling any chemical, consult the Safety Data Sheet (SDS) for proper handling and safety precautions.

References

  1. F. A. Putt
    Manual of Histopathological Staining Methods
    John Wiley & Sons, New York, NY., USA

Roque’s Trichrome for Mallory Bodies

By Protocols, Stain Type, Trichrome Staining, Trichrome, One-Step
Protocol

Roque's Trichrome

for Mallory Bodies

9
steps
6
materials

Materials

  • Weigert’s iron hematoxylin or equivalent
  • Solution A
    MaterialAmount
    Phosphomolybdic acid1g
    Distilled water100mL
  • Solution B
    MaterialAmount
    Aniline blue0.5g
    Chromotrope 2R2g
    Hydrochloric acid, 0.02N100mL

    Dissolve the aniline blue in the acid with gentle heat. Cool. Add the chromotrope 2R. Filter.

Tissue Sample

3µ paraffin sections of neutral buffered formalin fixed liver are suitable. Other fixatives are likely to be satisfactory. Most trichrome stains benefit from picric acid or mercuric chloride fixation. Formalin fixed tissues may benefit from secondary fixation of sections in Bouin’s fluid.


Protocol

  1. Bring sections to water via xylene and ethanol.
  2. Stain nuclei with Weigert’s iron hematoxylin or equivalent for 5 minutes.
  3. Wash in tap water to blue.
  4. Place into solution A for 2 minutes.
  5. Rinse with distilled water.
  6. Place into solution B for 8 minutes.
  7. Rinse with distilled water.
  8. Dehydrate with ethanol.
  9. Clear with xylene and mount with a resinous medium.

Expected Results

  • Nuclei  –  black
  • Cytoplasm  –  red
  • Muscle  –  red
  • Mallory bodies  –  bright blue, or red with blue periphery
  • Collagen  –  blue

Safety Note

Prior to handling any chemical, consult the Safety Data Sheet (SDS) for proper handling and safety precautions.


References

  1. Roque, Agustin L., (1953),
    Chromotrope aniline blue method of staining Mallory bodies of Laennec’s cirrhosis.
    Laboratory Investigation, v. 2, no. 5, pp. 15-21.

Carazzi’s Alum Hematoxylin

By Dye Type, Hematoxylin and Eosin Staining, Mordanted Hematoxylin, Protocols, Stain Type

Carazzi's Alum Hematoxylin

6
steps
5
materials

Materials

MaterialAmountFunction
Hematoxylin1 gDye
Potassium alum50 gMordant
Distilled water800 mLSolvent
Glycerol200 mLStabiliser
Sodium iodate0.2 gOxidant

Compounding procedure

  1. Dissolve the hematoxylin in the glycerol.
  2. Dissolve the alum in 750 mL of the water.
  3. Dissolve the sodium iodate in the remaining 50 mL water.
  4. Add the alum solution to the hematoxylin solution slowly, while mixing well.
  5. Add the sodium iodate solution. Mix well.
  6. Filter.
  7. The solution may be used immediately, and is stable for about six months.

Protocol

  1. Bring sections to water with xylene and ethanol.
  2. Place into the staining solution for 5 minutes.
  3. Rinse with water and blue.
  4. Rinse well with water.
  5. Counterstain if desired.
  6. Dehydrate with ethanol, clear with xylene and mount with a resinous medium.

Expected Results

  • Nuclei  –  blue
  • Background  –  as counterstain or unstained

Notes

  • This is a progressive solution giving little background staining.
  • Doubling the hematoxylin to 2 g intensifies nuclear staining.
  • The double strength solution is recommended for frozen sections with about 1 minute staining time.
  • Blueing is done with alkaline solutions such as hard tap water, Scott’s tap water substitute, 0.1% ammonia water, 1% aqueous sodium acetate, 0.5% aqueous lithium carbonate etc.
  • In the original paper, 0.02 grams sodium iodate was specified. This would oxidize only a small part of the hematoxylin. The amount specified above would permit full oxidation.

Safety Note

Prior to handling any chemical, consult the Safety Data Sheet (SDS) for proper handling and safety precautions.

References

  1. Bancroft, J.D. and Stevens A. (1982)
    Theory and practice of histological techniques, Ed. 2
    Churchill Livingstone, Edinburgh & London, UK.
  2. Gray, Peter. (1954)
    The Microtomist’s Formulary and Guide. p.187.
    Originally published by: The Blakiston Co.
    Republished by: Robert E. Krieger Publishing Co.
Llewellyn’s Sirius Red for Amyloid

By Amyloid, Direct Dye Staining, Eosinophils, Intracytoplasmic Granules, Paneth Cells, Protocols, Stain Target, Stain Type

Llewellyn's Sirius Red

for Amyloid

8
steps
3
materials

Materials

MaterialAmount
Sirius red F3B0.5g
Distilled water50mL
Ethanol, absolute50mL

Staining Solution Preparation

  1. Dissolve the dye into the water, add ethanol and mix well.
  2. Add 1 mL of 1% sodium hydroxide. Then, while strong backlighting and swirling, add drops of 20% sodium chloride until a fine haze is detected. Usually about 2 mL is adequate. Adding more than 4 mL causes excessive precipitation. The solution is reasonably stable for several months, but slowly deteriorates. Extend the staining time to compensate. When it requires more than 2 hours to adequately stain, prepare a new solution.

Tissue Sample

5µ paraffin sections of neutral buffered formalin fixed tissue are suitable. Other fixatives are likely to be satisfactory.

Protocol

  1. Bring sections to water via xylene and ethanol.
  2. Stain nuclei with a progressive alum hematoxylin for a few minutes.
  3. Rinse with tap water.
  4. Rinse with ethanol.
  5. Place into alkaline sirius red for 1 – 2 hours.
  6. Rinse well with tap water.
  7. Dehydrate with absolute ethanol.
  8. Clear with xylene and mount with a resinous medium.

Expected Results

  • Amyloid  –  red
  • Eosinophil and Paneth cell granules  –  red
  • Nuclei  –  blue
  • Background  –  colorless
   

Notes

  • Amyloid displays deep green birefringence when viewed with crossed polarisers, one above and one below the section.
  • Eosinophils and Paneth cell granules are also demonstrated. If used for this purpose the sodium chloride may be ommitted.
  • This method uses sirius red F3B. The dye Sirius red 4B is not suitable.

Safety Note

Prior to handling any chemical, consult the Safety Data Sheet (SDS) for proper handling and safety precautions.

References

  1. Llewellyn, B.D., (1970)
    An improved sirius red method for amyloid.
    Journal of Medical Laboratory Technology, v 23, 308